
使用Hexo + github快速搭建个人博客
安装依赖软件
安装git
1 | sudo brew install git |
安装Node.js
Mac下最简单的做法便是直接下载pkg文件进行安装,最新版本的下载地址如下,选择后缀为pkg的文件下载安装即可:
https://nodejs.org/download/release/latest/
安装完成后修改环境变量1
2
3vi ~/.bash_profile
添加
export PATH=/usr/local/bin:$PATH
将npm源替换成淘宝源
1 | npm config set registry http://registry.npm.taobao.org/ |
安装Hexo
安装前先介绍几个hexo常用的命令1
2
3
4$ hexo g #完整命令为hexo generate,用于生成静态文件
$ hexo s #完整命令为hexo server,用于启动服务器,主要用来本地预览
$ hexo d #完整命令为hexo deploy,用于将本地文件发布到github上
$ hexo n #完整命令为hexo new,用于新建一篇文章
利用 npm 命令安装:1
sudo npm install -g hexo
报错可尝试1
npm install --unsafe-perm -g hexo
本地建立博客
安装完成后,新建一个目录如 myblog 用于存放博客,切换到该目录下执行以下指令,Hexo 即会在目标文件夹初步生成博客所需要的所有文件:1
hexo init
然后切换到该目录下执行如下命令,安装所需要的依赖:1
sudo npm install
或1
2
3
4
5
6
7
8
9
10
11
12
13npm install hexo-generator-index --save
npm install hexo-generator-archive --save
npm install hexo-generator-category --save
npm install hexo-generator-tag --save
npm install hexo-server --save
npm install hexo-deployer-git --save
npm install hexo-deployer-heroku --save
npm install hexo-deployer-rsync --save
npm install hexo-deployer-openshift --save
npm install hexo-renderer-marked --save
npm install hexo-renderer-stylus --save
npm install hexo-generator-feed --save
npm install hexo-generator-sitemap --save
修改theme
网上有大量开发者们分享的模板可供选择使用,将它们的 Git 仓库 Clone 以后放到博客目录下的 themes 文件夹中即可:
Github Hexo Themes
有哪些好看的 Hexo 主题?
本博客的搭建我选择了使用该主题:
https://github.com/iTimeTraveler/hexo-theme-hiker1
git clone https://github.com/iTimeTraveler/hexo-theme-hiker.git themes/hiker
修改配置文件1
2
3
4
5
6
7cd myblog
vi _config.yml
将这里修改为hiker,默认为landspace
# Extensions
## Plugins: https://hexo.io/plugins/
## Themes: https://hexo.io/themes/
theme: hiker
生成静态文件,并查看1
2$ hexo g
$ hexo s
hexo s默认使用4000端口,如果冲突可以改为hexo s -p4001
然后用浏览器访问http://localhost:4001/,此时,你应该看到了一个漂亮的博客了,当然这个博客只是在本地的,别人是看不到的
部署本地文件到github
首先去github创建repository,次数省略.我创建的repository叫Fandb.github.io1
2
3
4
5
6
7
8
9
10
11cd myblog
vi _config.yml
改成如下内容
deploy:
type: git
repository:
github: https://github.com/Fanduzi/Fandb.github.io.git
coding: https://git.coding.net/Fandb/Fandb.blog.git
branch: master
发布到Github1
2$ hexo g
$ hexo d
执行上面的第二个命令,可能会要你输入用户名和密码,皆为注册Github时的数据,输入密码是不显示任何东西的,输入完毕回车即可。
此时,我们的博客已经搭建起来,并发布到Github上了,这时可以登陆自己的Github查看代码是否已经推送到对应Repository,在浏览器访问huangjunhui.github.io就能看到自己的博客了。第一次访问地址,可能访问不了,您可以在几分钟后进行访问,一般不超过10分钟。
需要注意的是,需要将这里设置为master branch并保存,才能访问你的页面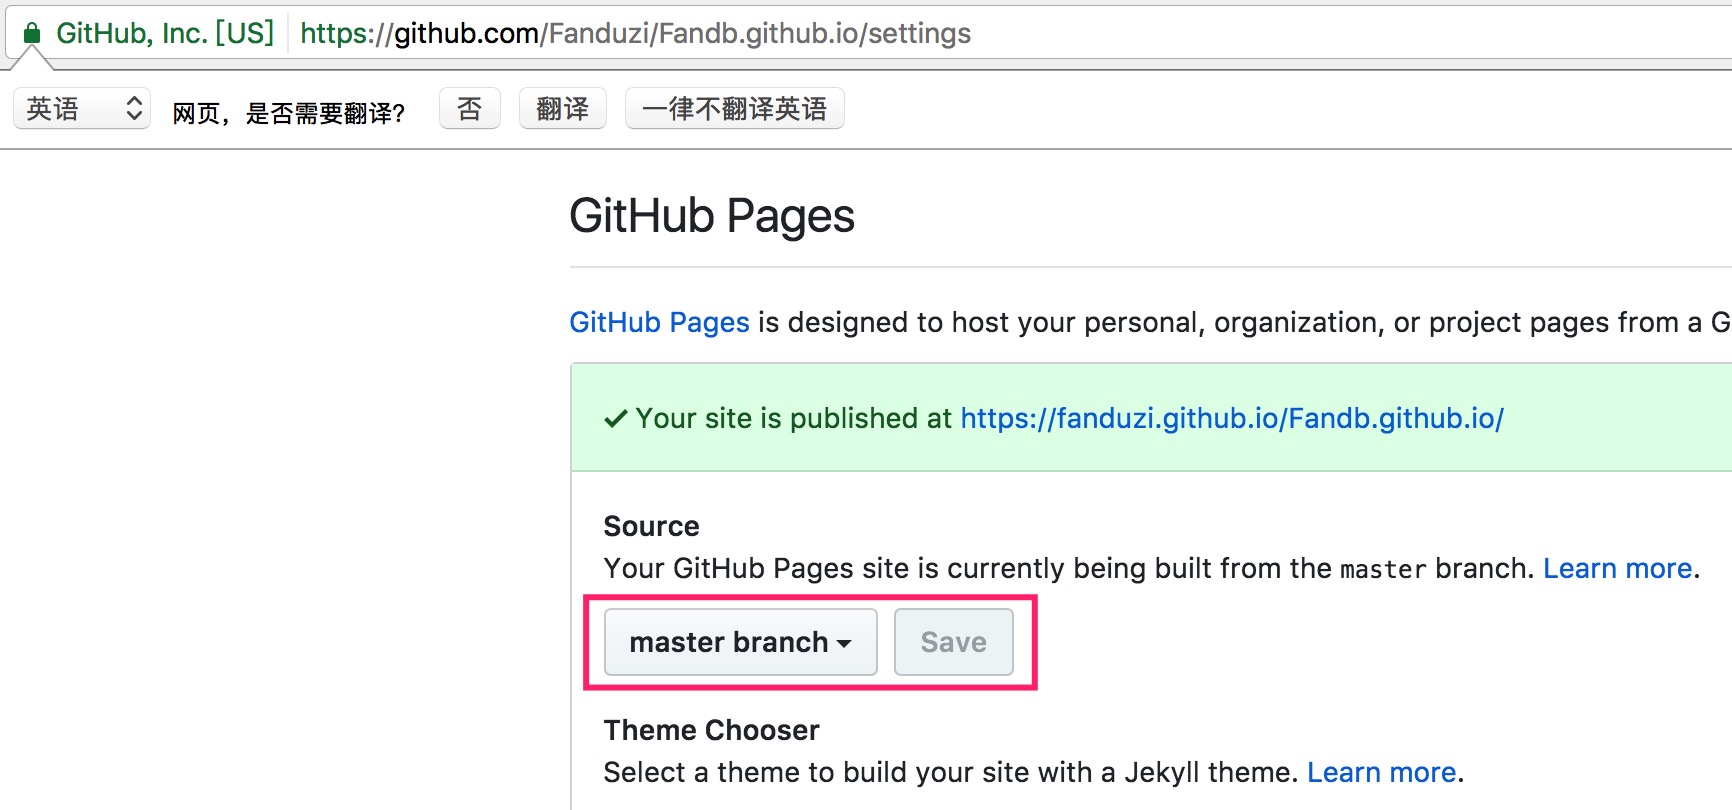
参考
http://opiece.me/2015/04/09/hexo-guide/
http://www.jianshu.com/p/6902dd4a0e75